Interested in learning ArcPy? check out this course.
In this post I will look at extracting point data from a CSV file and creating a Shapefile with the pyshp library. The data consists of the location of trees with various attributes generated by the Fingal County Council in Ireland. The data can be downloaded as a CSV file from dublinked.ie.
pyshp is a pure Python library designed to provide read and write support for the ESRI Shapefile (.shp) format and only utilizes Python’s standard library to achieve this. The library can be downloaded from https://code.google.com/p/pyshp/ and placed in the site-packages folder of your Python installation. Alternatively you can use easy-install…
easy_install pyshp
…or pip.
pip install pyshp
NOTE: You should make yourself familiar with the pyshp library by visiting Joel Lawhead’s examples and documents here.
The full code is at the bottom of the post, the following is a walkthrough. When ready to go open your favourite editor and import the modules required for the task at hand.
import shapefile, csv
We will use the getWKT_PRJ function discussed in a previous post.
def getWKT_PRJ (epsg_code):
 import urllib
 wkt = urllib.urlopen("http://spatialreference.org/ref/epsg/{0}/prettywkt/".format(epsg_code))
 remove_spaces = wkt.read().replace(" ","")
 output = remove_spaces.replace("\n", "")
 return output
Create an instance of the Shapefile Writer( ) class and declare the POINT geometry type.
trees_shp = shapefile.Writer(shapefile.POINT)
Set the autoBalance to 1. This enforces that for every record there must be a corresponding geometry.
trees_shp.autoBalance = 1
Create the field names and data types for each.
trees_shp.field("TREE_ID", "C")
trees_shp.field("ADDRESS", "C")
trees_shp.field("TOWN", "C")
trees_shp.field("TREE_SPEC", "C")
trees_shp.field("SPEC_DESC", "C")
trees_shp.field("COMMONNAME", "C")
trees_shp.field("AGE_DESC", "C")
trees_shp.field("HEIGHT", "C")
trees_shp.field("SPREAD", "C")
trees_shp.field("TRUNK", "C")
trees_shp.field("TRUNK_ACTL", "C")
trees_shp.field("CONDITION", "C")
Create a counter variable to keep track of the number of feature written to the Shapefile.
counter = 1
Open the CSV file in read mode.
with open('C:/csv_to_shp/Trees.csv', 'rb') as csvfile:
 reader = csv.reader(csvfile, delimiter=',')
Skip the header.
next(reader, None)
Loop through each row and assign each attribute in the row to a variable.
for row in reader:
 tree_id = row[0]
 address = row[1]
 town = row[2]
 tree_species = row[3]
 species_desc = row[4]
 common_name = row[5]
 age_desc = row[6]
 height = row[7]
 spread = row[8]
 trunk = row[9]
 trunk_actual = row[10]
 condition = row[11]
 latitude = row[12]
 longitude = row[13]
Set the geometry for each record based on the longitude and latitude vales.
trees_shp.point(float(longitude),float(latitude))
Create a matching record for the geometry using the attributes.
trees_shp.record(tree_id, address, town, tree_species, species_desc, common_name, age_desc,height, spread, trunk, trunk_actual, condition)
Print to screen the current feature number and increase the counter.
print "Feature " + str(counter) + " added to Shapefile."
 counter = counter + 1
Save the Shapefile to a location and name the file.
trees_shp.save("C:/csv_to_shp/Fingal_Trees")
Create a projection file (.prj)
prj = open("C:/csv_to_shp/Fingal_Trees.prj", "w")
epsg = getWKT_PRJ("4326")
prj.write(epsg)
prj.close()
Save and run the script. The number of features should be printed to the console.
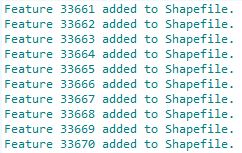
If you open the original CSV file you can see that there are also 33670 records. Navigate to the file location where you saved the Shapefile output. You should see four files shown below.

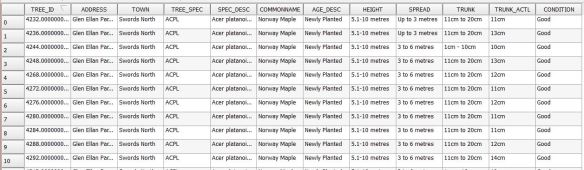
And just to make sure that the data is correct, here I have opened it up in QGIS.

And the attribute table…
And here’s the full code…
# import libraries
import shapefile, csv

# funtion to generate a .prj file
def getWKT_PRJ (epsg_code):
 import urllib
 wkt = urllib.urlopen("http://spatialreference.org/ref/epsg/{0}/prettywkt/".format(epsg_code))
 remove_spaces = wkt.read().replace(" ","")
 output = remove_spaces.replace("\n", "")
 return output

# create a point shapefile
trees_shp = shapefile.Writer(shapefile.POINT)

# for every record there must be a corresponding geometry.
trees_shp.autoBalance = 1

# create the field names and data type for each.
trees_shp.field("TREE_ID", "C")
trees_shp.field("ADDRESS", "C")
trees_shp.field("TOWN", "C")
trees_shp.field("TREE_SPEC", "C")
trees_shp.field("SPEC_DESC", "C")
trees_shp.field("COMMONNAME", "C")
trees_shp.field("AGE_DESC", "C")
trees_shp.field("HEIGHT", "C")
trees_shp.field("SPREAD", "C")
trees_shp.field("TRUNK", "C")
trees_shp.field("TRUNK_ACTL", "C")
trees_shp.field("CONDITION", "C")

# count the features
counter = 1

# access the CSV file
with open('C:/csv_to_shp/Trees.csv', 'rb') as csvfile:
 reader = csv.reader(csvfile, delimiter=',')
 # skip the header
 next(reader, None)

#loop through each of the rows and assign the attributes to variables
 for row in reader:
  tree_id = row[0]
  address = row[1]
  town = row[2]
  tree_species = row[3]
  species_desc = row[4]
  common_name = row[5]
  age_desc = row[6]
  height = row[7]
  spread = row[8]
  trunk = row[9]
  trunk_actual = row[10]
  condition = row[11]
  latitude = row[12]
  longitude = row[13]

  # create the point geometry
  trees_shp.point(float(longitude),float(latitude))
  # add attribute data
  trees_shp.record(tree_id, address, town, tree_species, species_desc, common_name, age_desc,height, spread, trunk, trunk_actual, condition)

  print "Feature " + str(counter) + " added to Shapefile."
  counter = counter + 1

# save the Shapefile
trees_shp.save("C:/csv_to_shp/Fingal_Trees")

# create a projection file
prj = open("C:/csv_to_shp/Fingal_Trees.prj", "w")
epsg = getWKT_PRJ("4326")
prj.write(epsg)
prj.close()
Any problems let me know.


